
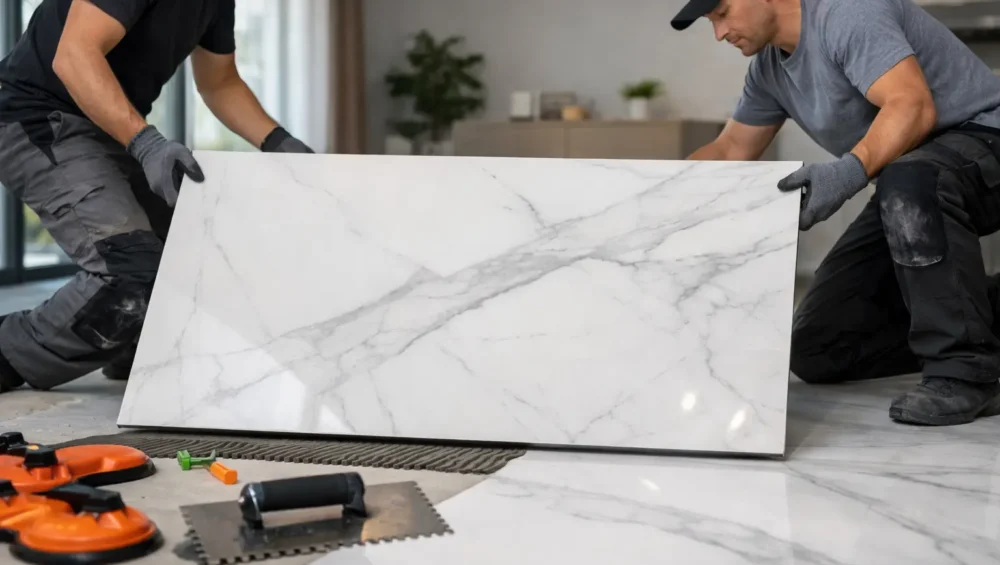
Large-format porcelain creates the kind of visual calm that smaller tiles cannot easily replicate: fewer grout lines, uninterrupted veining, and a more architectural finish. But a guide to porcelain slab installation must begin with one clear reality: these are precision materials, not oversized tiles to be handled with ordinary methods. The result depends as much on planning, substrate quality, and specialist installation as it does on selecting the right slab.
For kitchens, bathrooms, feature walls, fireplaces, floors, and outdoor entertaining areas, porcelain slabs offer a premium balance of refined design and everyday durability. Their low porosity, stain resistance, and broad range of stone, concrete, and marble-inspired finishes make them a compelling choice. Still, the correct slab thickness, finish, installation system, and edge detail will vary by application.
Start With the Right Porcelain Slab for the Space
The most successful installations begin before an installer arrives. Porcelain slabs are available in different thicknesses, commonly suited to wall cladding, flooring, countertops, exterior paving, or furniture applications. A thin slab may be ideal for a dramatic shower wall or fireplace surround, while a thicker product is generally required for a kitchen island, vanity top, or freestanding outdoor surface.
Consider how the space will be used. A polished marble-look slab can bring exceptional elegance to a powder room wall or low-traffic interior feature, but a honed, matte, or textured finish is often the more practical choice for wet areas, entryways, and exterior spaces. For floors, slip resistance and local code requirements should guide the selection alongside color and pattern.
Slab size matters, too. Large panels can minimize visual interruption, but they need clear access from delivery point to installation area. Measure hallways, stairwells, elevators, door openings, and turns well before ordering. In some projects, the preferred slab size is simply not practical to maneuver indoors without specialized equipment or a revised layout.
Plan Layout Before Cutting
A porcelain slab should be laid out on paper before it is cut on site. This is particularly important with veined, bookmatched, or directional designs, where the flow of the pattern affects the finished composition. Decide where seams will fall, how veins will meet at corners, and whether an uninterrupted run is possible on prominent walls or countertops.
For countertop projects, confirm the locations of sinks, cooktops, faucets, outlets, and overhangs. For wall applications, align joints with architectural features where possible rather than allowing them to land awkwardly at eye level. A well-considered layout makes a surface feel intentional, while poor joint placement can distract from even the most luxurious slab.
Prepare the Substrate With Absolute Care
Porcelain slabs do not conceal an uneven surface. Their large format can amplify minor imperfections in a wall or floor, creating voids beneath the panel or stress points that increase the risk of cracking. The substrate must be sound, clean, dry, flat, and appropriate for the setting material being used.
On floors, installers should assess levelness and flatness, then use suitable patching or self-leveling materials where needed. On walls, framing and backer boards must be secure and plumb. Wet areas also require a correctly installed waterproofing system beneath the slab assembly. Porcelain itself is highly water-resistant, but a beautiful surface cannot compensate for inadequate waterproofing behind it.
Substrate movement deserves close attention. New concrete needs adequate cure time, timber structures may require additional preparation, and areas exposed to heat, moisture, or changing temperatures need movement joints designed for the specific application. This is one area where shortcuts are expensive. A slab may look flawless on installation day, yet fail later if the structure beneath it moves beyond what the assembly can accommodate.
Use a Large-Format Installation System
Porcelain slab installation calls for purpose-built tools and materials. Professional installers typically use a high-performance mortar approved for large-format porcelain, slab lifting frames with suction cups, leveling systems, and rail-guided cutting equipment. These are not cosmetic upgrades to the process. They help control a material that can be both impressively strong in service and vulnerable to damage during handling.
The mortar must achieve thorough, consistent coverage. Installers commonly apply mortar to both the substrate and the back of the slab, then set the panel carefully to reduce air pockets. Voids are especially problematic on floors, around cutouts, and at exposed edges because they can leave parts of the slab unsupported.
Avoid assuming that a standard tile adhesive is sufficient. The correct adhesive depends on the slab dimensions and thickness, substrate, location, and exposure conditions. Exterior applications may require additional considerations for temperature change, drainage, and freeze-thaw conditions. Always follow the slab manufacturer’s specifications and the recommendations of the setting-material supplier.
Handle and Cut Slabs Professionally
A porcelain slab can require several people to lift and position it safely. Panels should remain properly supported during transport, cutting, and placement, using equipment designed to distribute their weight and prevent flexing. Attempting to carry a large slab by hand, especially around tight corners, creates unnecessary risk for both people and product.
Cutting also demands precision. Specialized wet saws, bridge saws, or score-and-snap systems may be used depending on the material and required cut. Sink openings, outlet penetrations, and inside corners need careful treatment because sharp internal corners can concentrate stress. Experienced fabricators typically use radiused corners and appropriate reinforcement methods around vulnerable cutouts.
This is why porcelain slab projects are best entrusted to an installer or fabricator with documented large-format experience. Ask to see completed work similar to your own, whether it is a waterfall island, shower enclosure, oversized floor, or exterior cladding detail. Familiarity with conventional tile installation does not automatically translate to expertise with porcelain panels.
Choose Joints, Grout, and Edges That Support the Design
Minimal grout joints are one of porcelain slab’s defining visual advantages, but they should never be eliminated where movement accommodation is required. Joint width depends on the slab, installation conditions, and the accuracy of the substrate and cuts. In many designs, a color-matched grout allows joints to recede, preserving the appearance of a continuous surface.
Movement joints should be planned at perimeters, changes of plane, and other locations required by the installation system. These are typically filled with a flexible sealant rather than rigid grout. They allow the surface assembly to respond to normal building movement without transferring stress into the slab.
Edge detailing is equally influential. For countertops and islands, a mitered edge can create the appearance of a substantial stone block while retaining the practical benefits of porcelain. A simple eased edge offers a cleaner, more contemporary expression. In bathrooms, carefully finished external corners and recessed niches make the installation feel tailored rather than merely tiled.
Allow Proper Cure Time Before Use
A newly installed slab surface may look complete quickly, but mortar, grout, sealant, and waterproofing components need time to cure. Do not place heavy furniture on a porcelain slab floor, expose a shower to water, or load a countertop until the installer confirms that the system has reached the required cure period.
Once complete, porcelain is refreshingly straightforward to maintain. Routine cleaning with a pH-neutral cleaner and a soft cloth or mop is usually enough to preserve its finish. Avoid abrasive pads and harsh products that may affect grout, sealant, or decorative surface treatments. Unlike many natural stones, porcelain generally does not require sealing, though grout and specific installation details may have their own care requirements.
Bring the Installation Team Into the Selection Process
The most elegant porcelain slab projects are collaborative from the outset. Share slab specifications, intended layout, site measurements, appliance details, and finish preferences with your installer before finalizing the order. This helps identify access restrictions, quantity allowances, trim needs, and fabrication requirements early, when design changes are still easy to make.
A porcelain slab is a statement surface, but its lasting appeal comes from the quiet precision behind it. Choose a finish suited to the way you live, allow time for thoughtful planning, and work with specialists who treat every cut, joint, and edge as part of the design.