A beautifully tiled shower can make a bathroom feel like a private retreat, but its most critical layer is the one you never see. If you are researching how to waterproof shower tiles, start with this essential distinction: tile, grout, and most stone finishes are not the waterproofing system. The real protection sits behind and beneath the surface, where a properly installed membrane directs water safely to the drain.
Getting that assembly right protects the framing, subfloor, and surrounding rooms from slow leaks that may not become visible until costly damage has occurred. It also gives premium porcelain, ceramic, mosaic, or natural stone tile the stable, dry foundation needed to retain its beauty over time.
What Actually Makes a Tiled Shower Waterproof?
A shower is a wet-area system, not simply a wall covered in tile. Water can pass through cement-based grout, tiny joints around fixtures, and natural variations in porous materials. Even glazed porcelain tile is highly water-resistant, but the joints between tiles and the penetrations through the wall still require protection.
A complete shower waterproofing system typically includes a sloped shower base, a waterproof membrane, correctly treated seams and corners, a compatible drain connection, and flexible sealant at movement joints. Tile adhesive and grout are then installed over that protected layer.
The membrane may be a liquid-applied coating, a sheet membrane, or a preformed shower-pan system. Each can perform exceptionally well when installed according to its manufacturer specifications. The best choice depends on the shower layout, substrate, drain type, tile selection, and the experience of the installer.
How to Waterproof Shower Tiles: The Right Build Order
Waterproofing belongs before tile installation, not after. A topical sealer can help protect grout and some natural stones from staining, but it cannot correct a missing or failed membrane behind the tile.
Start with a sound, properly prepared substrate
Walls must be plumb, flat, clean, and structurally secure. In a shower, standard drywall is generally not an appropriate tile backing in wet areas unless it is part of a specific approved waterproofing assembly. Cement board, foam tile backer board, or another manufacturer-approved substrate is commonly used.
The shower floor needs equal attention. It must be shaped so water moves toward the drain rather than collecting beneath the tile. A consistent slope of about one-quarter inch per foot is a common benchmark, though local code requirements and the drainage system should always guide the final detail.
A level shower floor may look precise before tiling, but it is not functional. Standing water can contribute to staining, odor, grout deterioration, and persistent moisture in the assembly.
Choose a waterproofing membrane designed for showers
Liquid membranes are rolled, brushed, or troweled onto walls and floors. They are especially useful for complex shapes, recessed niches, benches, and awkward transitions because they can form a continuous coating around details. The trade-off is that they must reach the required thickness. Applying the product too thinly is a frequent installation error, so professionals use wet-film gauges and follow the required number of coats.
Sheet membranes provide a consistent manufactured thickness and are often favored for their reliable coverage. Their success depends on careful overlap, bonded seams, and precise work at inside corners, pipe penetrations, and the drain.
Preformed shower-pan systems can simplify the floor installation and create an integrated route to the drain. They can be a smart choice for renovations where speed, predictable slopes, and system compatibility are priorities. However, the base dimensions, drain location, and wall assembly must all be planned together.
Mixing products from unrelated systems can create uncertainty around adhesion and warranty coverage. For a high-value bathroom, using one compatible system from substrate through drain detail is a more confident approach.
Reinforce every seam, corner, and transition
Most waterproofing failures do not occur in the open field of a shower wall. They occur where one surface meets another: wall-to-floor corners, board joints, shower niches, benches, curbs, and the areas surrounding plumbing valves and showerheads.
These locations need the reinforcement method specified for the membrane, often with seam tape, preformed corners, or waterproof banding. The membrane should continue across the full wet area and connect securely to the shower pan and drain flange.
Do not overlook a built-in niche. It is a practical design feature, but it creates multiple horizontal surfaces that must be sloped slightly outward and waterproofed with great care. Water should never be able to settle at the back or base of the niche.
Flood-test the shower before tile is installed
Once the shower pan and membrane have cured, a flood test is one of the most valuable quality checks available. The drain is plugged, the shower base is filled with water, and the water level is monitored for the period required by local regulations or project specifications.
This test is performed before tile covers the work, when any issue is still accessible. A small delay at this stage is far preferable to removing a finished tile installation later. For new construction, remodels, and luxury bathrooms alike, this is a detail worth insisting on.
Install tile with materials suited to the application
After waterproofing has passed inspection or flood testing, tile can be set with a high-quality thinset mortar compatible with the chosen membrane and tile type. Large-format porcelain may require a mortar formulated for larger tile, while transparent or light-colored stone can need a white mortar to avoid shadowing.
Coverage matters as much as the mortar choice. Voids behind wall tile can weaken support and allow moisture to collect in localized areas. On shower floors, proper coverage is particularly important because the assembly faces continual water exposure and foot traffic.
For a shower floor, smaller tiles or mosaics are often the most practical choice. Their more frequent grout joints allow the finish to follow the slope toward the drain. Large-format tiles can create a refined, minimal look on shower walls, but they require very flat substrates and careful layout for a crisp result.
Grout and Sealant: Protective Finishes, Not the Primary Barrier
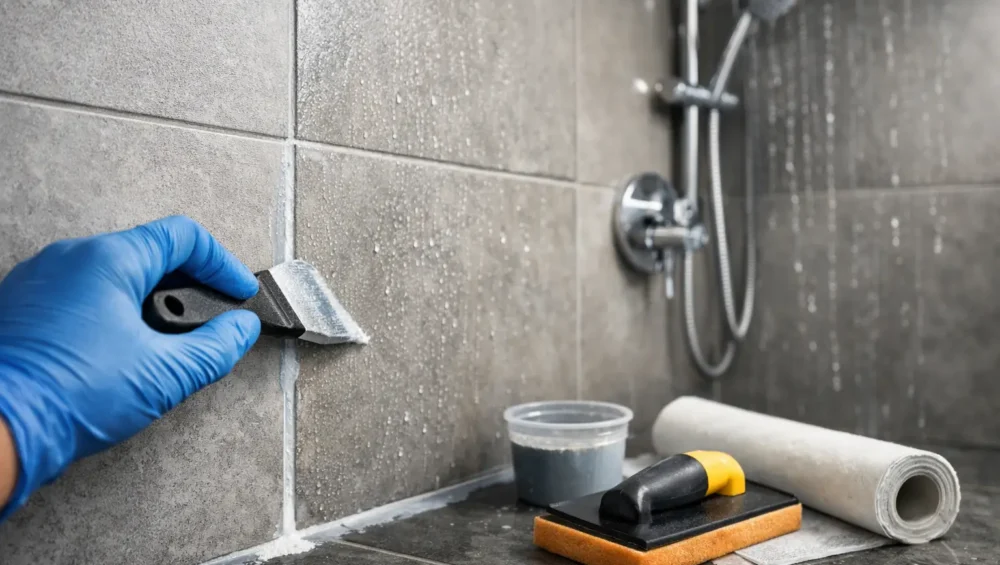
Grout finishes the installation and helps support the visual character of the design. Epoxy grout is highly resistant to staining and moisture absorption, making it a compelling option for busy showers and light-colored grout lines. It is durable but less forgiving to install, so experienced workmanship is valuable.
Cement-based grout remains widely used and offers a broad range of colors and finishes. Depending on the product, it may need sealing after curing. Sealer reduces absorption and helps simplify maintenance, but it does not make cement grout waterproof.
At changes of plane, such as where wall tile meets floor tile or where two tiled walls meet, use a flexible silicone sealant rather than rigid grout. Buildings move subtly with temperature, settling, and normal use. Flexible joints accommodate that movement and reduce the risk of cracking.
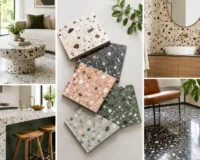
Natural stone deserves an additional layer of consideration. Marble, limestone, travertine, and some terrazzo finishes can bring exceptional depth and luxury to a shower, yet their porosity and sensitivity to certain cleaners vary. Select a stone suitable for wet-area use, seal it with an appropriate penetrating sealer when recommended, and maintain it with pH-neutral products. Porcelain can offer the same dramatic veining or stone-inspired appeal with lower maintenance demands.
Common Waterproofing Mistakes to Avoid
A premium tile selection cannot compensate for shortcuts beneath it. The most consequential mistakes are often invisible until the shower has been used for months or years.
- Treating grout sealer as the waterproofing layer.
- Skipping membrane reinforcement at corners, seams, niches, and pipe penetrations.
- Installing a shower floor without a consistent slope to the drain.
- Tiling before a membrane has fully cured or been flood-tested.
- Grouting changes of plane instead of using flexible sealant.
- Using materials that are not approved to work together within the same shower system.
These details may seem technical, but they are what allow an elegant bathroom to perform as beautifully as it looks.
Plan the Finish Around Performance
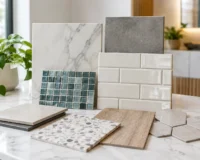
The most successful shower designs balance visual impact with everyday practicality. Matte porcelain can create a quiet, architectural backdrop and is generally easy to care for. Mosaic tile adds texture, color, and grip underfoot. Large-format wall tile minimizes grout lines for a more expansive, contemporary effect. Natural stone delivers unmistakable character, but it asks for thoughtful selection and ongoing care.
Before ordering, consider the tile’s size, finish, slip resistance for floors, maintenance needs, and compatibility with the shower layout. Samples are particularly useful in a bathroom, where lighting can shift dramatically between daylight and evening. Seeing the surface alongside cabinetry, fixtures, and paint helps ensure the final palette feels intentional.
For homeowners and trade professionals creating a shower with lasting presence, Mecca Tiles offers curated surfaces that pair elevated design with practical room-by-room selection. The right tile can transform the visible finish, while a professionally executed waterproofing system protects the investment behind it.
A shower should feel effortless once it is complete. Build the unseen layers with the same care you bring to the tile, and every detail above the surface will have the foundation to endure.